Docsvault allows you to send Notification emails to different people based on a particular field choice.
Options available:
•Using Choice Lists (Dropdown, Radio, Choice List or Checkbox)\
Dynamic Notification Using Choice List
This is a simplest way of dynamically sending email notifications. Using Docsvault's Choice List controls you can easily setup your form to send email notification to specific department or person depending on the choice selected by your respondents.
Let's take an example of Leave Application. While filling up the form depending on the department selected by respondent, an email notification will be send to specific department or supervisor associated with it. Let's see in action:
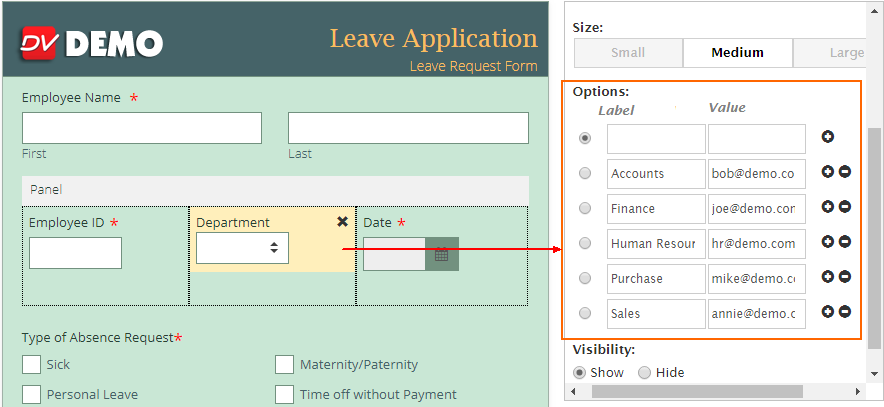 |
Step 1) Create a Choice Field
A Dropdown, Radio, Choice List or Checkbox field can be used for this task. Add one of these to your form, and add the choices for the respondent to pick from. In above example, we have used a Dropdown field and have listed departments in Label with its associated individual person/department email address in Value.
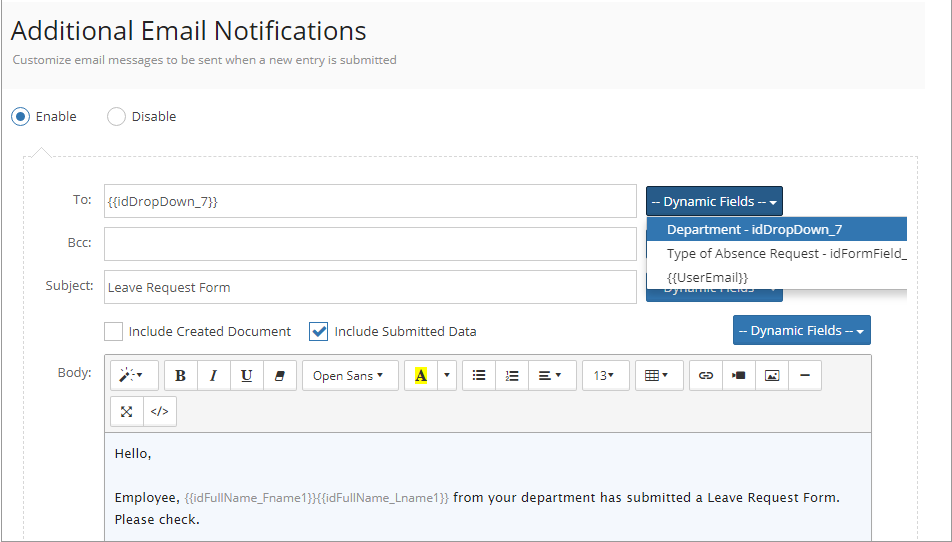
Step 2) Setup Email & Notifications
Send an email to certain person/department depending on the 'Department' selected
To do so, in Email & Notifications, under Additional Email Notifications - Use the Dynamic Fields option to pull data from a form entry and specify To or Bcc field with Department variable. This variable will be replaced with the email address associated with the Department selected by the respondent while filling up the form.
You can create a customized message and choose to do the following:
•Include data of the submitted form
•Attach the form submission as PDF
 |
Dynamic Notification Using Field Rules
In this method, we would be using Field Rules to send notification emails to specific person within an organization depending on the choice selected by your respondents.
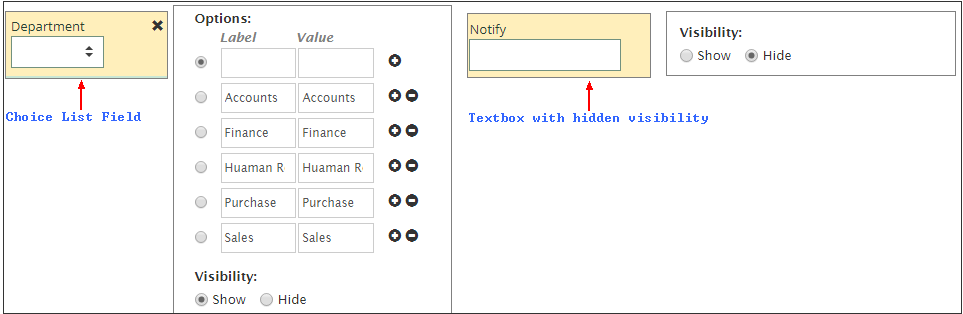
Step 1) Create Fields
We're going to create two fields:
1.A Control field (a dropdown, radio, choice list or checkbox) to provide respondents the option of choosing their department.
2.A hidden Texbox field in which we will conditionally set value in Field Rules.
 |
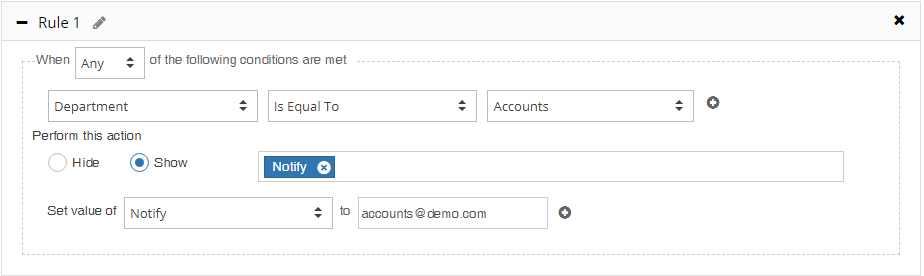
Step 2) Setup up Rules
With the form built it's time to setup the Field Rules. You can access the Field Rules for each form by clicking Options link of the form row or from the top menu when in design mode.
Select Field Rules tab, and then Add Rules as in the image for each of the choices available within our drop down field. Each choice you created in Step 1 will now have its own rule. In the example below, rule is created by selecting the field 'Department' and comparing it with the choice. Then define the Action. The hidden
Notify textbox field can be made visible by selecting Show option (it is not necessary to show the textbox for rules to work). And the value is set by entering the email address of the person/department who is supposed to get the email notification when that choice is selected.
 |
Step 3) Setup Email & Notifications
Notification emails are the automated messages that are sent to the receipts defined in Email & Notification once the form is submitted. To dynamically send notification to the recipients based on the choice selected by respondents, setup Additional Email Notification. Specify Notify field from the Dynamic Fields drop down against the email fields (To/Bcc) .
In our example above, when users select "Accounts" from the dropdown, notification emails would be sent to "accounts@demo.com"